
Wang tiles
Automatic tile generation for Houdini
Automatic tile generation

Imagine endless random patterns defined from only a few initial tiles.
The concept “wang tile” is described by Hao Wang, a mathematician and philosopher, ages ago. Since then there has been plenty of research on the topic. Cohen* et al wrote a paper on Wang Tiles for Image and Texture Generation*
I was initially inspired to explore this by an old ICE project by Vincent Ullmann* for the bygone 3D app Softimage XSI
I am going to present a breakdown of the Wang tiling process and a way to implement, apply and expand Wang tiling in the procedural 3d app Sidefx Houdini while describing the learning path I followed for everyone to experience.
*References and attributions will be at the end of the post.

So, a show of hands: Who knows the game Pac-man?
Epic labyrinth mayhem with ghosts and all. We’ll circle back to Pac-man but first, let’s talk about an other game: Dominoes.

In the game Dominoes each tile has two ends, with a number represented by dots.
The goal is to place the tiles so the ends match the next tile.
Wang Tiles are square Dominoes, with numbers on all four edges.
For clarity let’s name the edges like a compass:
North (up), South(down), East(right), West(left).

Behold the Wang Tile.
The tiles have random combinations of numbers and are placed in a deck. The tiles are then to be placed in a grid of any size. All edges has to match. This can be done manually, like so:
Recipe for manual pattern generation:
Excerpt from Wang Tiles for Image and Texture Generation*
Select any tile for the NWcorner;
tile the top row left to right by choosing tiles for which the W edge of the new tile matches the E edge of the previous tile;
select a first tile for the next row such that the N edge matches the S edge from above;
continue this row by randomly selecting tiles for which the N and W edges match the S and E edges from above and the left respectively (since our set contains all NW combinations, this is always possible); and
goto step 2 for as many rows as desired.

Easy, right?
Note that previous recipe. That’s more or less a computer program written in plain speak; “Pseudo code”. It can be translated into whatever coding language you prefer.
Now, the tiles doesn’t have to be numbers. They can be colors or patterns. Anything we can match. But we can use the numbers as a simple way to make comparisons, when we translate this to code.
How I did it:

I used some simple graphics to begin with. Four tiles, one is a blank. This deck isn’t going to be enough to get randomness, and it will fail - according to research we need a minimum of nine tile variants to avoid pattern repetition. Let’s create some more by rotating each tile 90° three times and add the new variants to the deck

Here’s the deck. There’s duplicates but that’s ok. It’s a way to introduce bias into the final generated pattern. The fact that there’s 4 blanks will make sure there are bigger blank spots in the result.
With a simple design easy to make and also decode visually and a general understanding of how the process of wang tiling works I sketched the procedure as simply as posible.
Procedural flowchart

I made a simple flowchart: Draw some tiles, add numeric values for the edges, automate rotation, pack it into a deck, define the pattern size and run everything through the magic code box.
I gave the edges attributes and values for their direction (NSEW) as well as their connectivity. 1 or 0
Here’s how that works on two of the tiles. you get the idea.

This is how it looks inside Houdini.

Being a node based procedural app it’s relatively easy to implement flowcharts. This is simply how the application works. I made an interface for adding values to the edges and a tickbox for rotation.
Albeit more technical, still relatively simple and quite similar to the flowchart drawing.
the Magic Code Box

Remember the recipe from earlier? The Pseudo code in plain speak. Well, this is it, just translated into Houdinis code language VEX. It may look complicated but it’s a really simple piece of code.
I loop the deck of tiles through this and it’ll create a pattern in any size.
And the result (drumroll) 10x10 and 20x20 grid.

Nice! By matching up the edges we are generating a path like design. The cross-tile rotation gives the impression of the path going over and under. Let’s create a 50x50 and a 100x100 grid.

Success. Notice how random the final result looks. It’s only from 16 tiles, but we recycled so really it’s only 3 variants and a blank.
I think that’s bloody impressive. Mission accomplished!
So what can we do with this?
Texture generation is one obvious usage. Designing a minimal number of tiles and spewing out infinite combinations is very production efficient and quite magical.
here’s another example that came out quite nice.

While the tiling process is two-dimensional, the content of the tile doesn’t have to be. As long as the edges match. In this tube-example the result has been processed further and all connected pieces have been colored. This breaks up the tile pattern. imagine procedural city generation.
Similarly in this motherboard example, the resulting connections are fused and points are animated along the paths.
Remember Pac-man? Check this out:
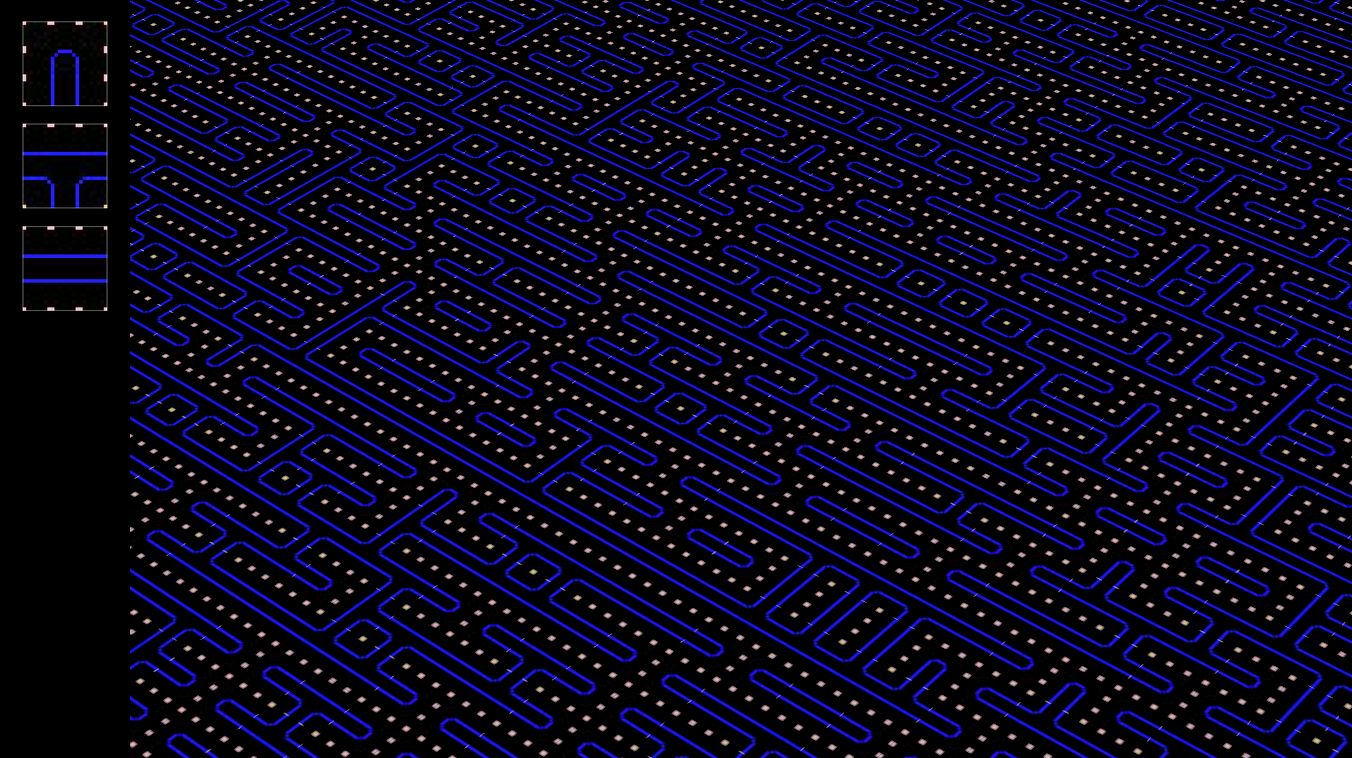
Using only three tile designs with rotation, giving us esentially ten unique tiles (two of the straight tiles are duplicates) you can play Pac-man for eternity. What a nightmare. But here is an other thing Wang tiling can be used for:
Game level design

First person shooter? Isometric labyrinth puzzle? This staircase level could easily be exported to Unreal with a few clicks. Creating these interconnecting tiles, breaking them apart and figuring out how to give the edges numbers is a very satisfying process.
Here are a few of the designs I tested while developing the tool.
But wait a minute…
While watching the examples you may find one of the designs stands out. This grid is actually made from hexagonal tiles. It means more edges has to match and demands an expansion of the code but it works.

Remember the game Monument Valley? IMO One of the most fascinating and beautiful mobile games developed.

So while 6 edges offers a whole new type of result, the clever monkey will realise one very interesting thing:
If the code works on 6 edges it will also work on 6 planes, meaning it will work in 3 dimensions, exposing the opportunity for creating
WANG CUBES!
- You could even add a 4th dimension, time and have animated bloxels. Go for it!
I’ll leave you here, having presented a breakdown of the Wang tiling process and a way to implement, apply and expand Wang tiling in the procedural 3d app Sidefx Houdini while describing the learning path I followed for everyone to experience.
Thanks!
*References:
Wang Tile on Wikipedia
Hao Wang, mathematician and philosopher
Cohen et al Wang Tiles for Image and Texture Generation (pdf)
ICE project by Vincent Ullmann